.NET MAUI without my Mac [Part 2]
Building on the previous post, this guide walks through the detailed process of handling Apple certificates, provisioning profiles, and signing requirements to successfully produce a signed iOS app—all without direct access to a Mac.

![.NET MAUI without my Mac [Part 2]](https://images.unsplash.com/photo-1555099962-4199c345e5dd?crop=entropy&cs=tinysrgb&fit=max&fm=jpg&ixid=M3wxMTc3M3wwfDF8c2VhcmNofDE3fHxtYWMlMjBjb21wdXRlcnxlbnwwfHx8fDE3NDc2NDI3ODh8MA&ixlib=rb-4.1.0&q=80&w=2000)
Building directly on a Mac using Xcode is a straightforward process. Apple designs its ecosystem to simplify workflows within its own tools while making external processes far more challenging. As outlined in Part 1 - Without my pants, running a macOS build agent is simple enough, but generating a signed iPhone application introduces additional complexity.
Prerequisites
This process assumes familiarity with Git, Visual Studio, and .NET MAUI. In addition to the steps covered in Part 1 - Without my pants, this stage also requires Open SSL for Windows, PowerShell, and an active Apple Developer Program subscription.
Generating Profiles and Certificates
Xcode can automate the entire certificate and profile process on a Mac. The steps covered here replicate what Xcode performs behind the scenes.
There is no shortage of information online regarding certificate types and their specific use cases. In most cases, Google or ChatGPT will point you in the right direction. However, this guide intentionally takes a manual approach. Some information provided by these tools is outdated, and Apple has recently updated the naming conventions for its certificates and provisioning profiles, creating additional confusion when following older documentation.
Generating a certificate
The process is similar to creating standard SSL certificates. Start by using OpenSSL to generate a new certificate key, typically named distribution.key. This key is then used to create a Certificate Signing Request (CSR), saved as distribution.csr, which will be submitted to Apple.
The following commands will generate both the key and CSR files:
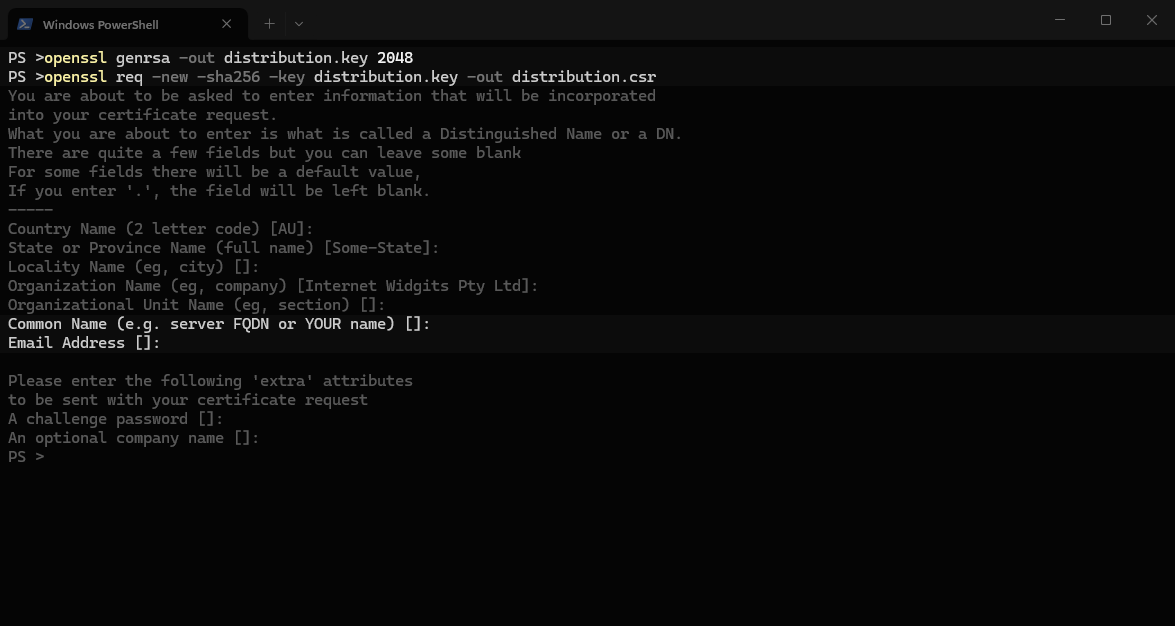
The CSR fields are important and will be used later. Complete as many fields as possible, but at a minimum, include either the fully qualified domain name or your name.
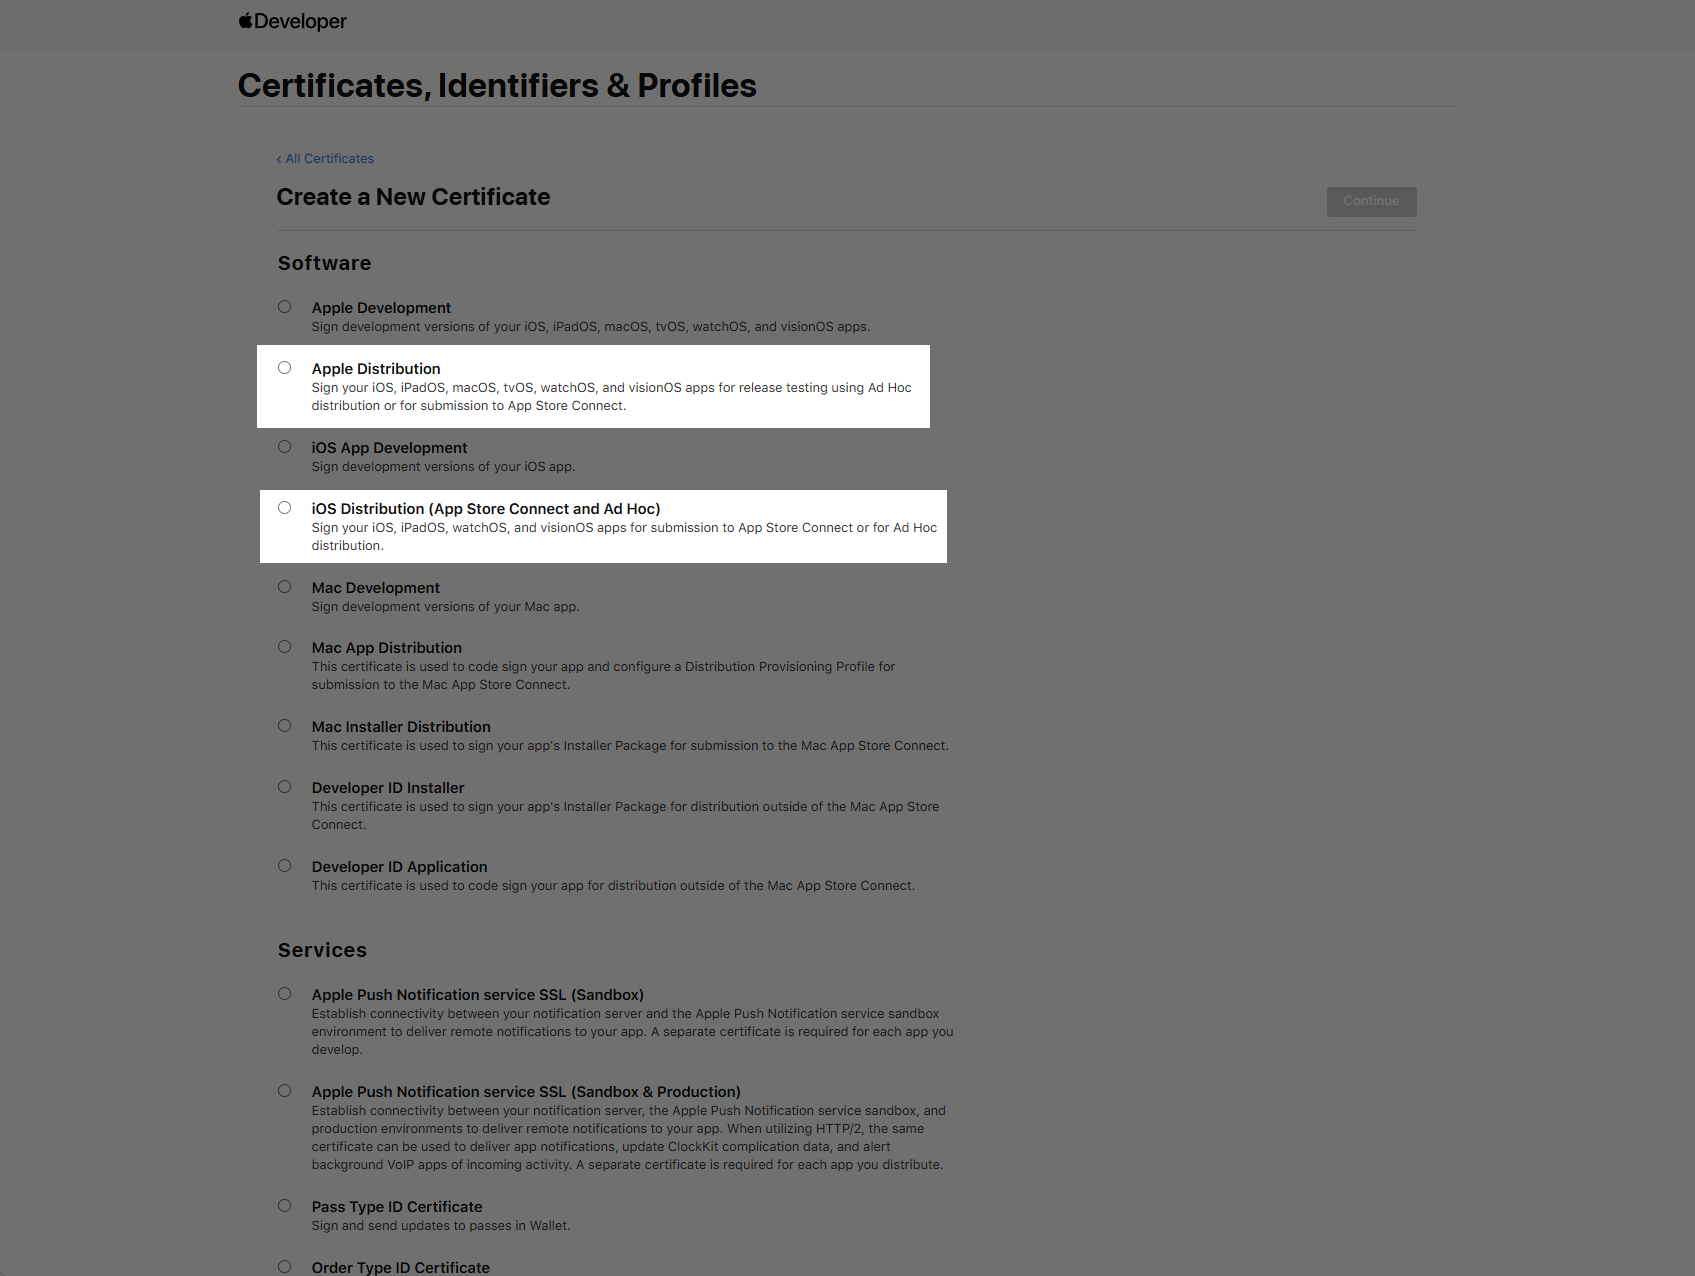
With the CSR prepared, visit Apple’s Certificate Management pageand select either Apple Distribution or iOS Distribution, depending on your requirements.
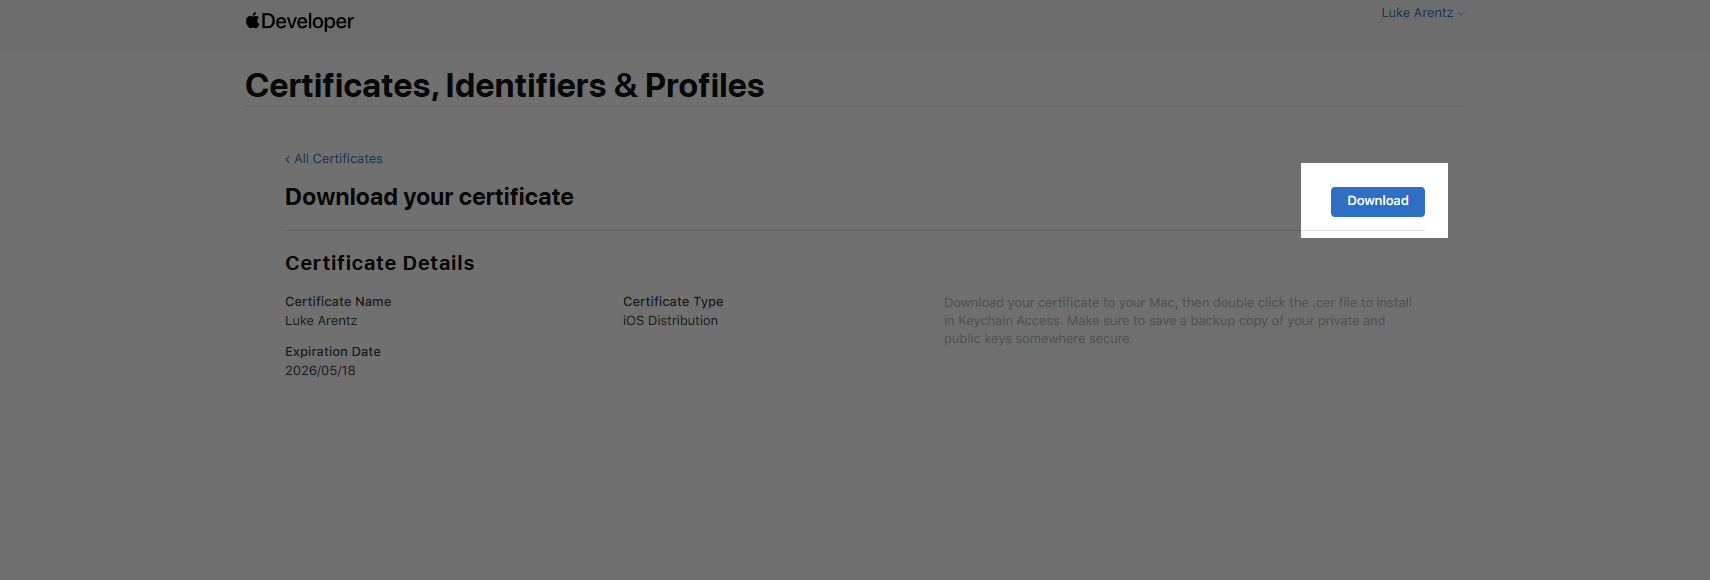
Upload the CSR and Apple will generate a .cert file corresponding to the request. Download the certificate and place it in the same directory as the original .csr file. The downloaded certificate will have a name based on the type selected earlier. Ensure it is named distribution.cer to keep it consistent with the sample code.
Next, combine the .cer file with the private key to produce a .p12 file, which is the required format for signing. Xcode expects this file to contain both the private and public keys.
Use the following commands to generate distribution.p12:
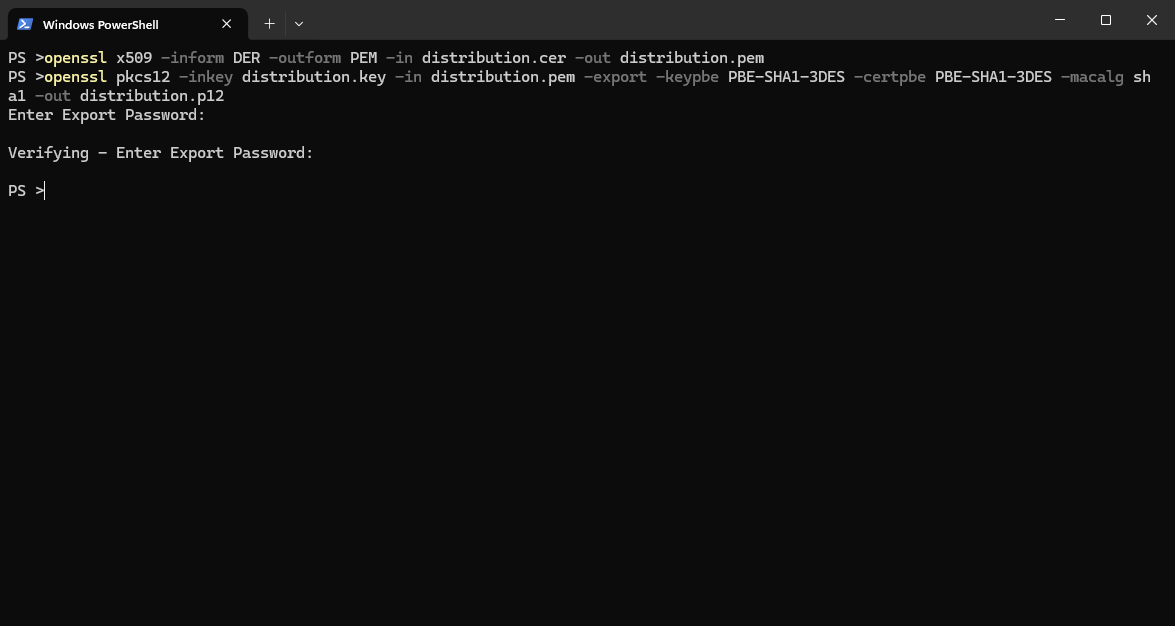
Although it might seem convenient to skip setting a password, doing so often leads to failures during signing, even if some documentation or ChatGPT suggests otherwise.
With the certificate created, the next step is to define an app identifier and create a distribution profile.
Register a new App Identifier
Every application must have a unique identifier. This usually follows a reverse domain name pattern, such as com.companyname.mymauiblazorapp. If the identifier is unknown, it can be found in Visual Studio under the project properties.
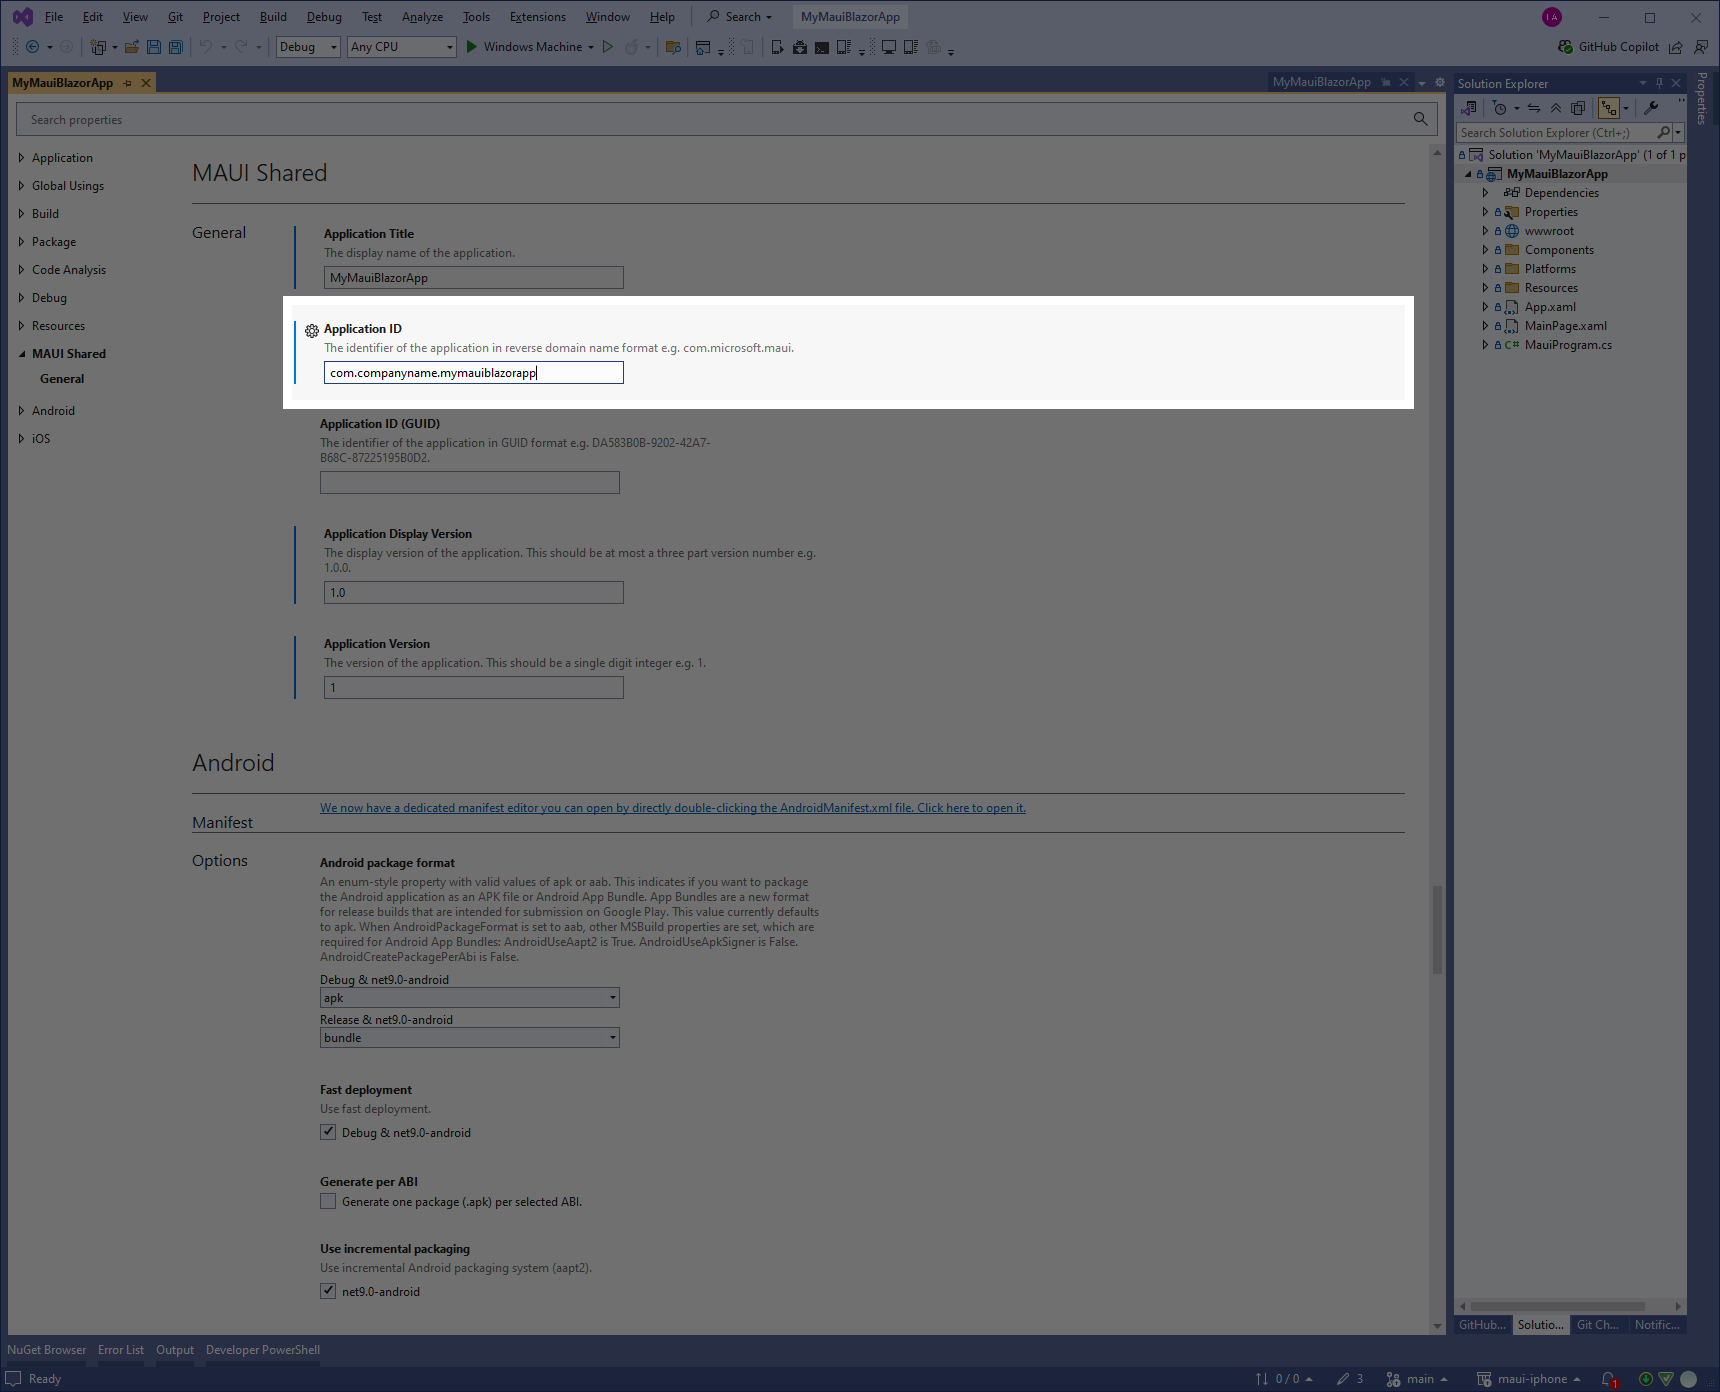
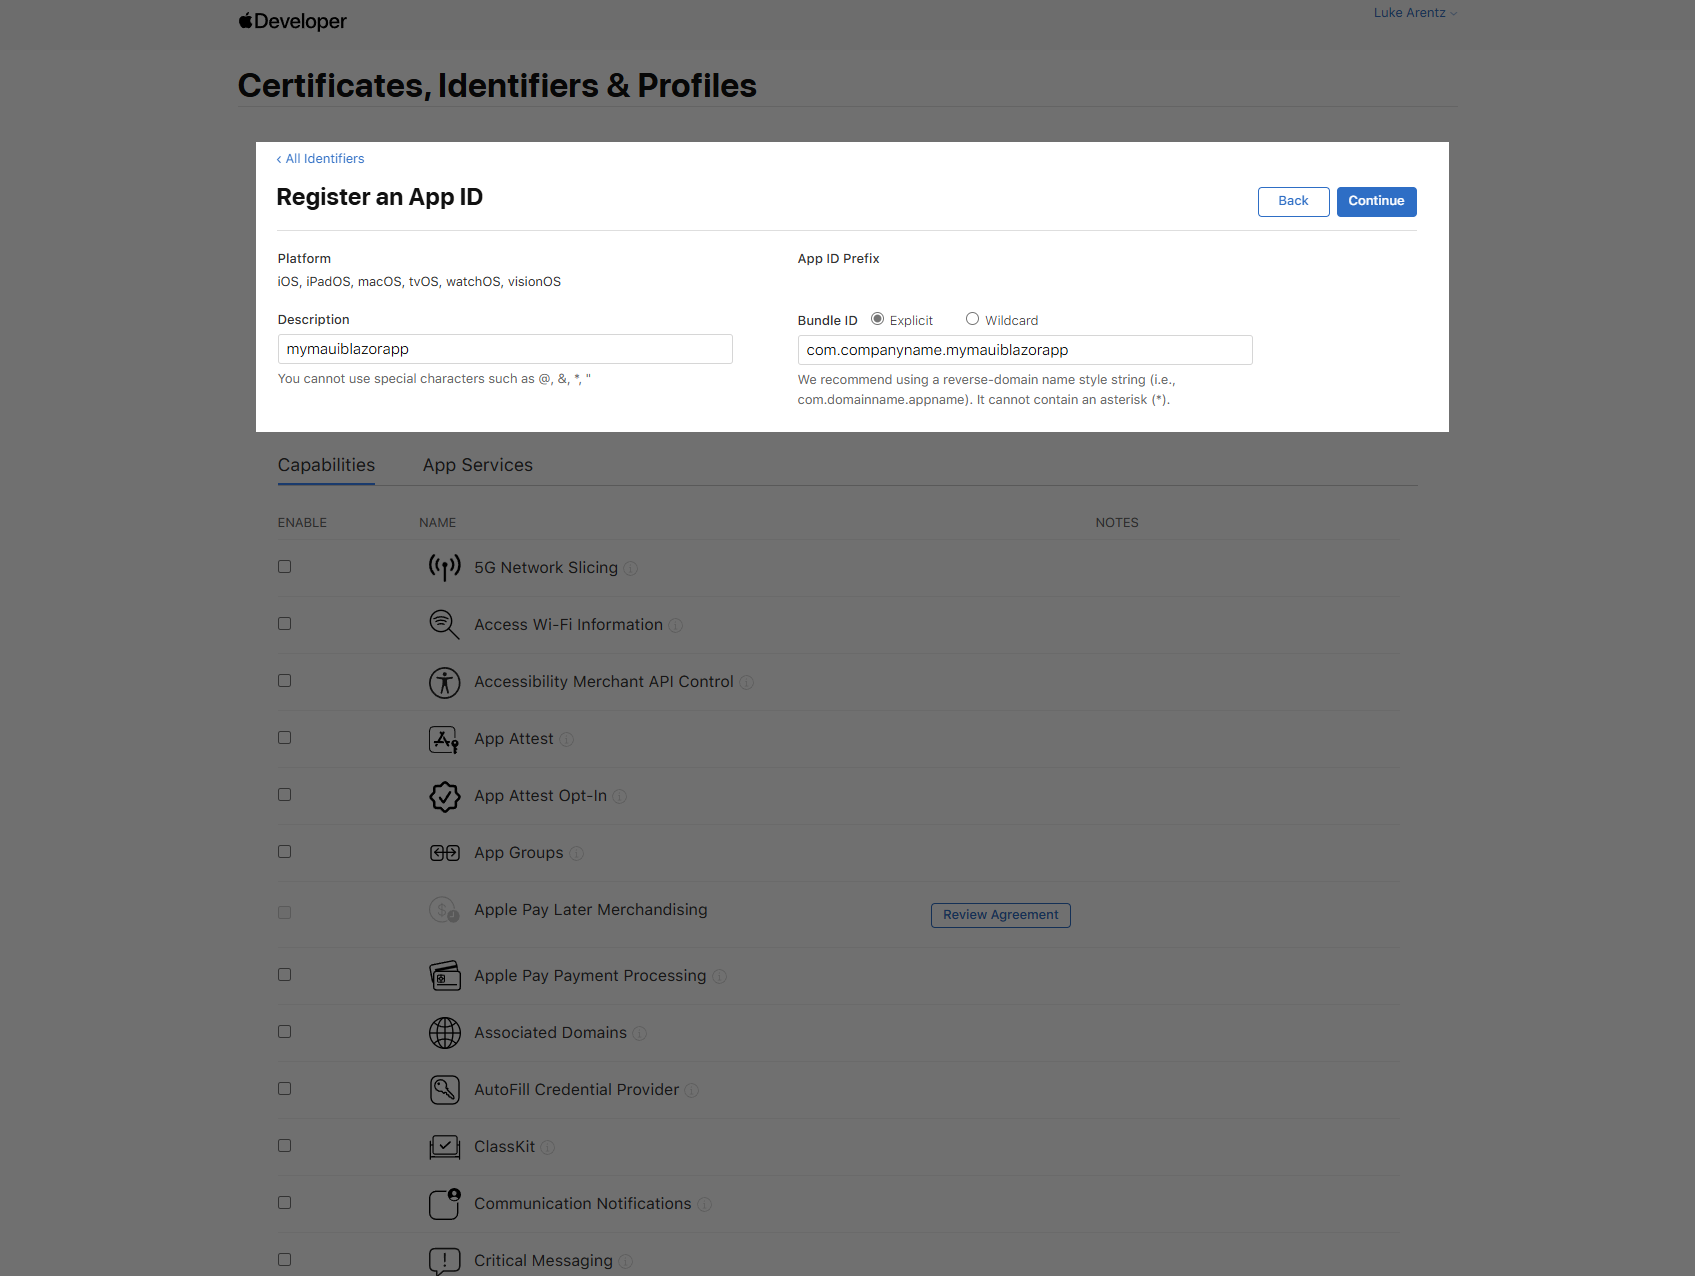
After confirming the app ID, navigate to Apple's Identifier Registration page to create a new identifier. The Capabilities and App Services sections are not required at this stage. These can be configured later if needed.
With the certificate and App ID created, the next step is to define create a Provisioning Profile.
Generate a Provisioning Profile
A Provisioning Profile defines which application, using which certificate, is authorized for deployment. Once the certificate and app identifier are ready, create a provisioning profile to link them together.
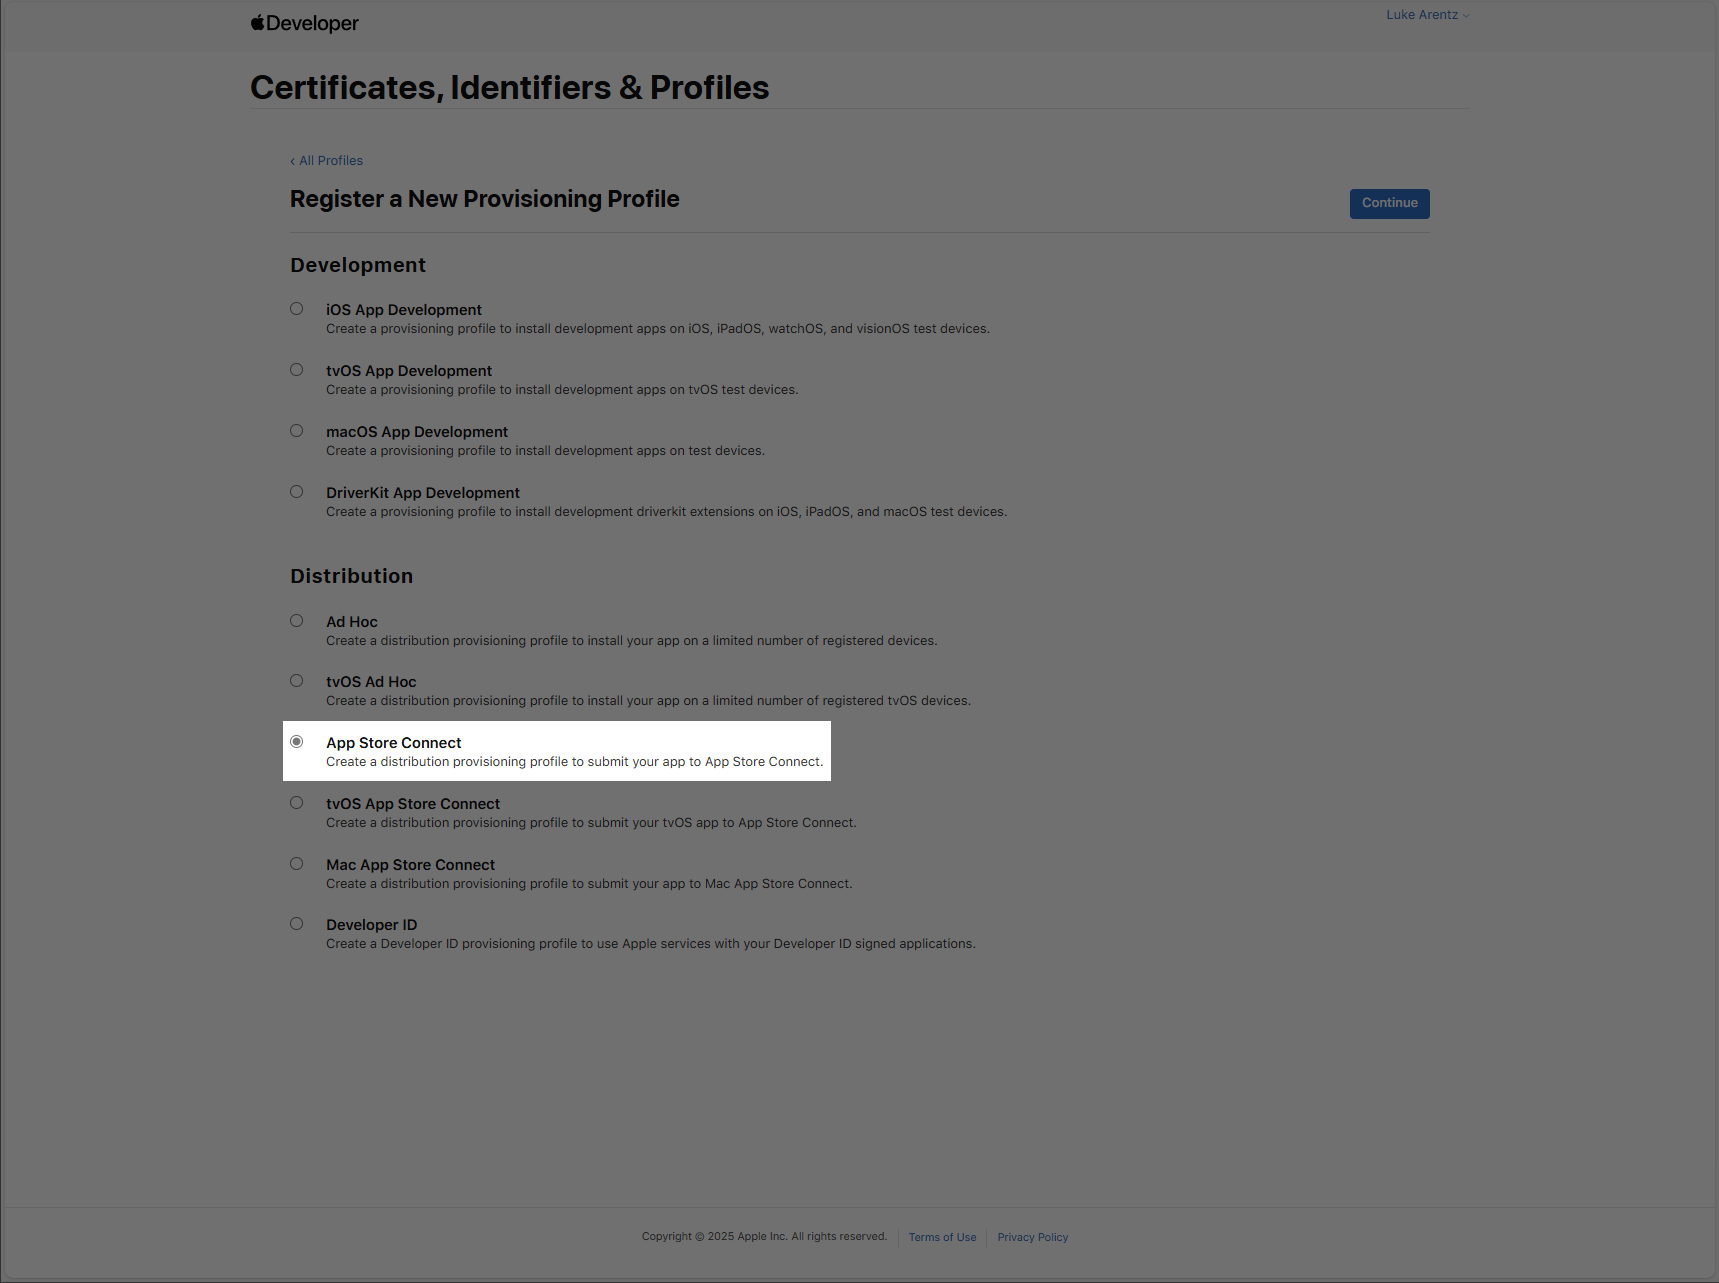
Go to Apple’s Provisioning Profile page. Despite what ChatGPT might suggest, select App Store Connect for the distribution profile. This option enables app distribution and TestFlight.
Continue through the prompts. Select the certificate and app identifier created earlier. Other options may appear if the account already contains existing items, so ensure the correct selections are made to avoid issues later.
Assign a name to the provisioning profile when prompted, for example, mymauiblazor. This name will be referenced in later steps.

Bringing Everything Together
With the required certificates and profiles created, the final task is to make them available to the GitHub macOS build agent.
The build process uses .NET, but ultimately calls Xcode behind the scenes. Xcode expects certificates and profiles to be placed in specific locations: the macOS keychain and a designated profiles directory
dotnet CLI for building.To support this, update the build.yml file to install the certificates and provisioning profiles and configure the build environment accordingly.
After pushing the latest changes to GitHub, the build will still fail. This happens because the necessary secrets have not yet been added to the GitHub pipeline.
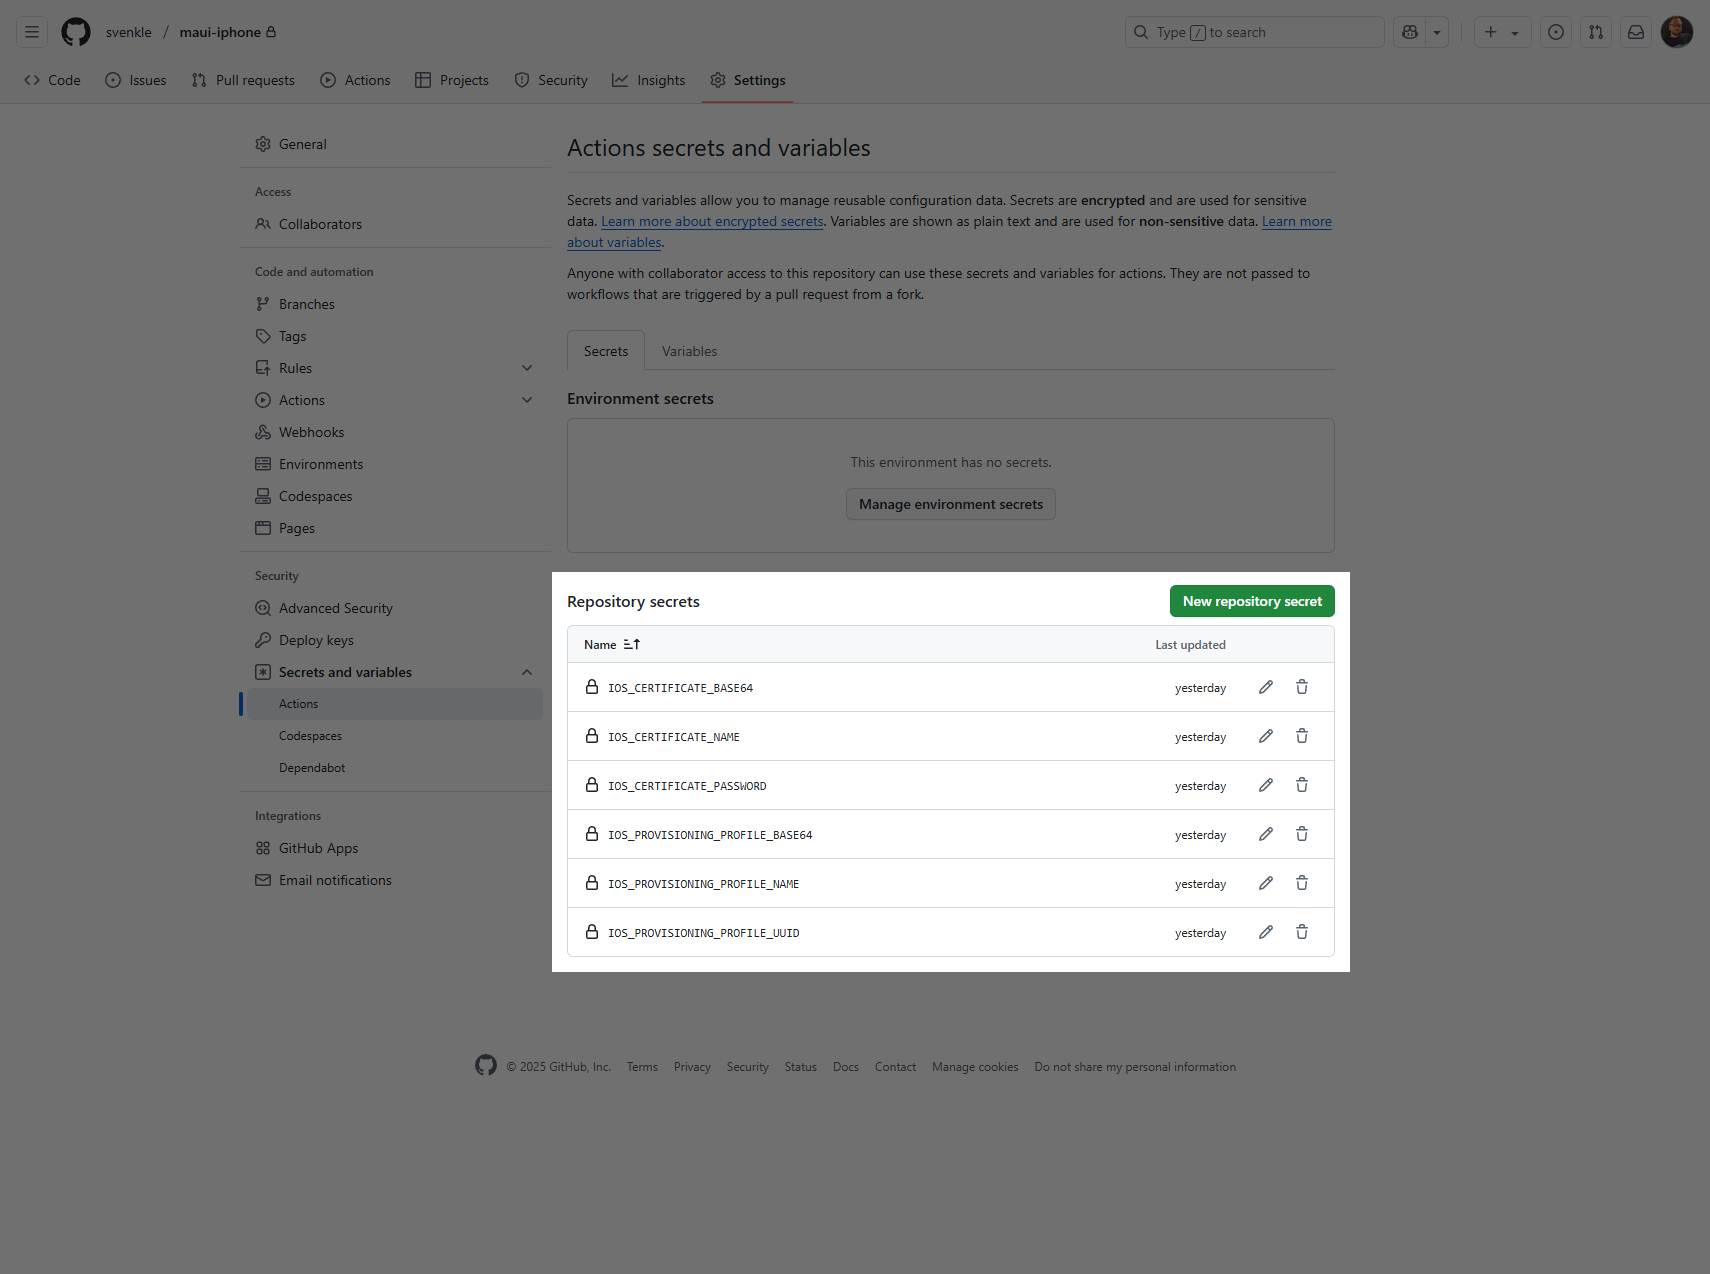
Adding secrets to GitHub
The updates to build.yml include several references to GitHub secrets. Using secrets prevents sensitive information such as certificates and passwords from being exposed in plain text.
| Key | Example Value |
|---|---|
| IOS_PROVISIONING_PROFILE_UUID | bf3d411c-b0fa-456c-bf7d-e538dc63a5d3 |
| IOS_PROVISIONING_PROFILE_NAME | mymauiblazorapp |
| IOS_CERTIFICATE_NAME | Apple Distribution: Luke Arentz (ABCDEFGHAB) |
| IOS_CERTIFICATE_PASSWORD | ****** |
| IOS_PROVISIONING_PROFILE_BASE64 | ... |
| IOS_CERTIFICATE_BASE64 | ... |
Certificate Name
The common name assigned when generating the certificate, typically in the format Apple Distribution: FQDN/Name (ACCOUNT). Confirm this value using any standard certificate viewer.
Certificate Password
The password created when generating the .p12 file.
Provisioning Profile UUID
Located within the .mobileprovision file, such as mymauiblazorapp.mobileprovision. Open the file with a text editor to locate this value.
Provisioning Profile Name
The name assigned to the provisioning profile during creation, for example, mymauiblazorapp.
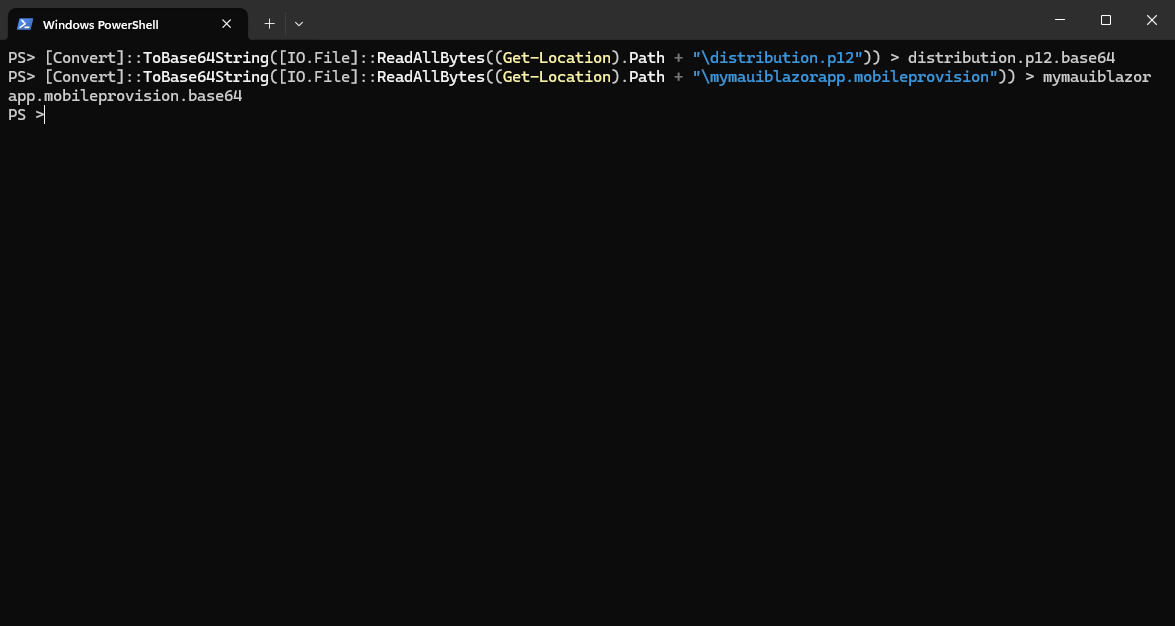
Provisioning Profile and Certificate Base64
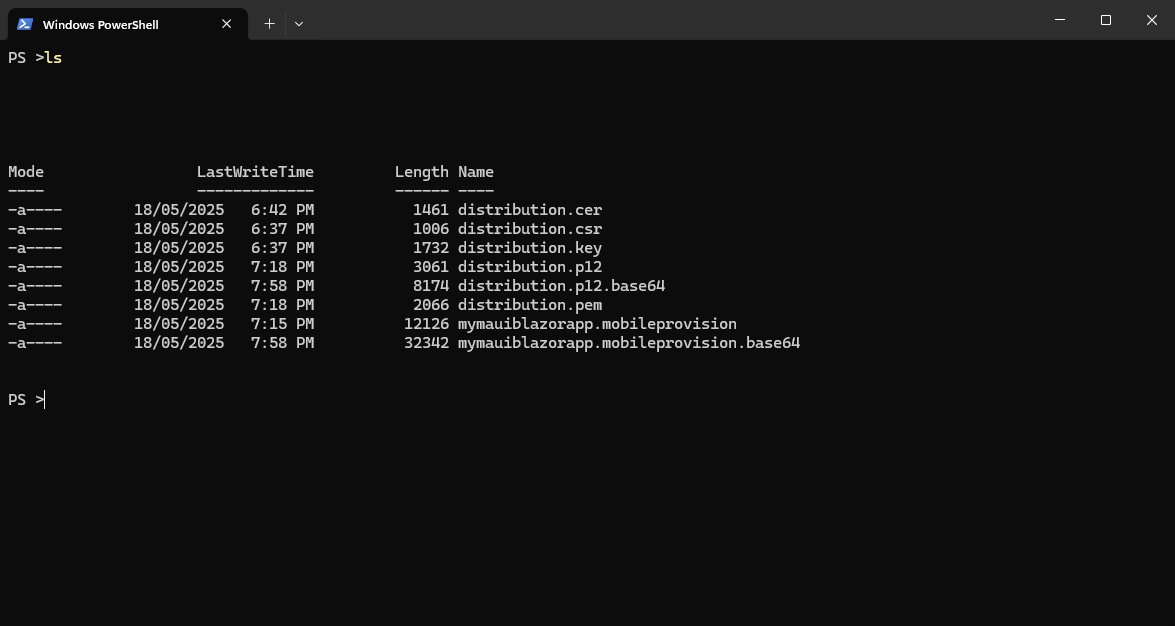
These are the Base64-encoded versions of the certificate and provisioning profile files. Convert the certificate and provisioning profile files to Base64 strings using the following commands. Ensure the values are copied exactly, without any trailing CR or LF characters.
At this point, the certificate directory should be organized, and the required GitHub secrets properly configured.
An honest ending
At this stage, the build is unlikely to succeed when using GitHub runners. These environments are significantly underpowered, and in this case, the build consistently stalled with unrelated errors. Numerous GitHub issues report ongoing issues with iOS builds on GitHub runners, including wasted build minutes and persistent failures.
For now, this seemed like a natural stopping point—but the exploration isn’t over yet. The next part continues in Part 3 - Putting on my pants.
Previously on
- Part 1 - Without my pants
Explore whether it’s possible to build .NET MAUI iOS applications without owning a Mac. This post introduces the challenge, outlines initial setup steps, and investigates options using GitHub-hosted macOS runners.
Up next
- Part 3 - Putting on my pants
This final part explores cloud build platforms like Codemagic to complete the iOS build process. Learn how to work around the limitations of GitHub runners and reach a practical solution for building .NET MAUI apps in the cloud.